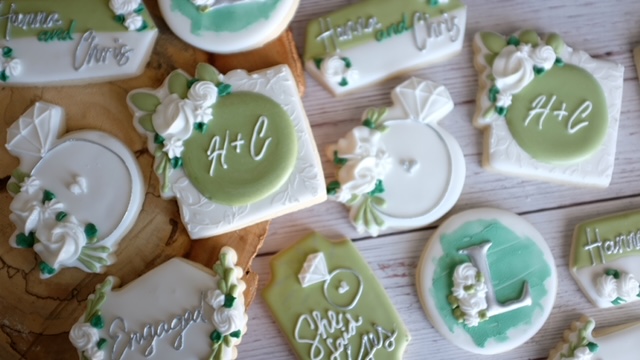
10 Easy Photography Tips to Make Your Cookies Stand Out | Rolling in Dough
10 Simple Photography Tips to Make Your Cookies Look Irresistible
You’ve put in the time, effort, and creativity to bake and decorate beautiful cookies—now it’s time to show them off! Great photography can make a world of difference when it comes to attracting attention online and enticing potential customers. In fact, social media posts with high-quality images receive 94% more engagement than those without (Social Media Today). But you don’t need to be a professional photographer to make your cookies look irresistible. With these 10 simple tips, you’ll be snapping drool-worthy photos in no time.
1. Use Natural Lighting
One of the easiest and most effective ways to improve your photos is to use natural light. Place your cookies near a window with soft, indirect sunlight to avoid harsh shadows and overexposure. The best times for this are usually in the early morning or late afternoon.
Pro Tip: If the sunlight is too bright, use a sheer curtain or a piece of white paper to diffuse it for softer lighting.
2. Choose a Simple Background
When photographing cookies, the star of the show should be your baked creations—not a busy background. Use neutral-colored backgrounds like white, light gray, or soft pastels to complement your cookies without stealing the spotlight. A simple cutting board or piece of parchment paper can work wonders.
Quote to Inspire: “A beautifully captured product photo is your silent sales pitch.” – Shopify
3. Highlight the Details
One of the best parts about custom cookies is the intricate detailing. Make sure to capture those fine touches by zooming in or taking close-up shots. Whether it’s the delicate piping, colorful sprinkles, or unique patterns, highlighting the details makes your cookies stand out.
Stat to Remember: 75% of people base their purchasing decisions on product photos (MDG Advertising).

4. Experiment with Angles
Don’t be afraid to try different angles to see what works best for your cookies. Top-down shots are great for capturing groups of cookies, while a 45-degree angle can highlight height and layers. Eye-level shots add a personal touch and can make the viewer feel like they’re about to take a bite.
Try This: Take at least three shots from different angles for each setup and choose the one that showcases your cookies best.
5. Incorporate Props
Props can add context and personality to your photos, but less is more. Simple items like a rolling pin, a cookie cutter, or a small bowl of sprinkles can enhance your photo without overwhelming it. Make sure the props are relevant to baking to keep the theme cohesive.
Pro Tip: Use props in the background or off to the side so they frame your cookies, rather than overshadow them.
6. Use a Tripod for Stability
Blurry photos can ruin even the most beautiful cookies. Using a tripod helps ensure your photos are crisp and stable. There are plenty of affordable options available, and many tripods come with attachments for smartphones.
Why It Matters: A stable shot can make your images look professional and polished, building trust with your audience.
7. Adjust Focus and Exposure
Whether you’re using a camera or a smartphone, make sure to manually adjust the focus and exposure settings. Tap the screen on your smartphone to lock focus on your cookies, and slide your finger up or down to adjust brightness. This ensures that the cookies are sharp and well-lit.

8. Capture Close-Ups of Details
For an extra “wow” factor, take macro shots that show the details up close. This could be a sprinkle pattern, the texture of the icing, or any unique decorative touches. These detailed shots create interest and showcase the quality of your work.
9. Edit Photos for a Polished Look
Don’t underestimate the power of editing. Basic adjustments to brightness, contrast, and saturation can make a huge difference. You don’t need fancy software—apps like Snapseed and Lightroom Mobile are free and user-friendly.
Editing Tip: Avoid heavy filters that change the natural colors of your cookies. The goal is to enhance, not alter.
10. Practice and Have Fun!
Photography is an art that gets better with practice. Don’t be afraid to experiment with different setups, lighting, and props. The more you practice, the more confident you’ll become in your photography style.
Quote to Remember: “You don’t take a photograph, you make it.” – Ansel Adams

Conclusion
Beautiful photos can set your cookie business apart and draw more eyes to your creations. By using natural light, experimenting with angles, and paying attention to detail, you can create stunning, professional-looking photos that showcase your cookies and attract more customers. So grab your phone or camera, set up your workspace, and start snapping photos that will have customers coming back for more!
Try out these tips and watch as your cookie photos transform from good to irresistible. Happy baking and photographing!